£0.00

No products in the basket.

Get FREE delivery on all orders!

£0.00

No products in the basket.

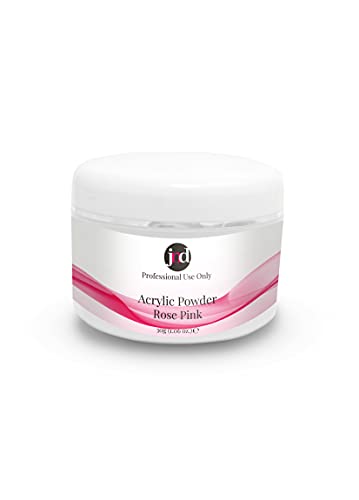
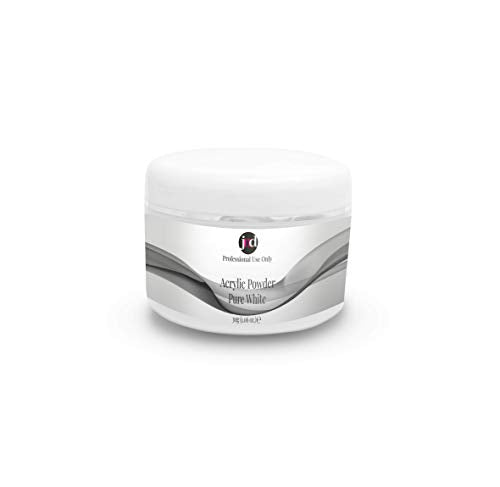
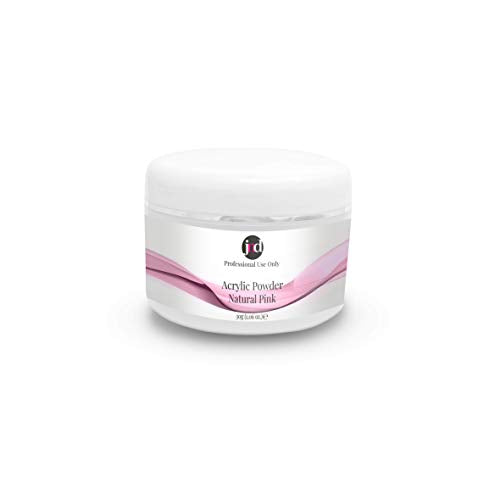
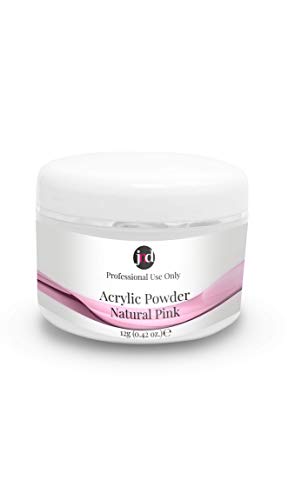
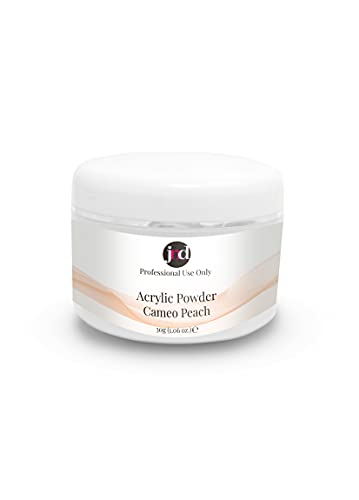
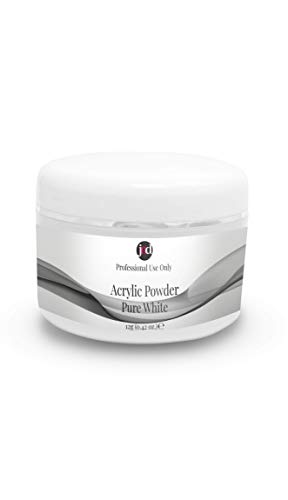
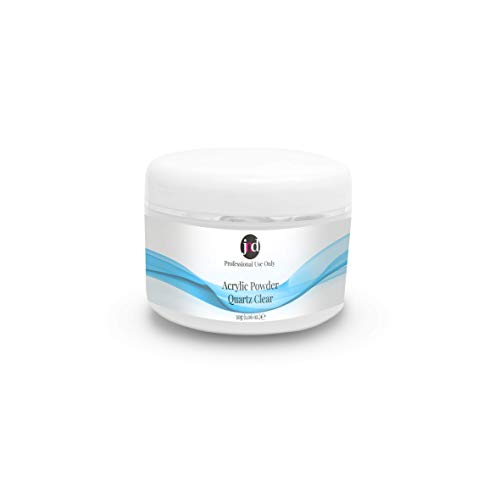
Home Beauty JND Acrylic Powder Professional Salon Quality Acrylic Nails Extension Nail Art 12 g Pink

JND Acrylic Powder Professional Salon Quality Acrylic Nails Extension Nail Art 12 g Pink

£2.68
  • Ultra strength and adhesion (*When used with quality acrylic liquid)
  • Ultra fine powder for a smooth finish (Excellent workability and self-levelling flow, less e-file work)
  • An essential product for creating nail art, false nail extensions
  • Advanced Polymer Powder (For speed and accuracy)
  • 100% Pure Premium Polymer (Not mixed with inferior polymers)

Product Description Acrylic powder has been a staple of the Nail Beauty industry for years now, and we are dedicating to constantly upholding and improving the standard of the materials available for you to use. JND Acrylic powders are created by professionals for everyone to use, we don’t see why home users shouldn’t also have access to the best of the best! Our powders are used in professional salons and by mobile nail techs as well as thousands of home users across the country. JND Acrylic Powders are made from 100% Pure, Premium Polymers, and we will never ‘water down’ any of our powders with inferior product. What you can use our powders for: Nail Extensions Nail Extensions are always in fashion, not only for people that want longer nails to show off, but for people who want to grow their nails, acrylic overlays can help too! Strengthen and repair nails with acrylic to encourage natural nail growth. Carving and sculpting Create stunning 3D nail art with JND Acrylic powder! Our powder has a quick working time, so it will set within 3-5 minutes, making it perfect for building and shaping non-traditional shapes Adhesive Nail glue not quite strong enough? Fancy jewel inserts too flat to stick to the natural curve of a nail properly? Not a problem! You can use small acrylic beads to create an adhesive surface that you can mould around and smooth into the shape of the nail, creating a long-lasting solution for those of you that love to have bling on your nails. Features: Self-Levelling Non-Yellowing Durable and Strong Easy to use Professional Quality Superior Adhesion (when used with a quality monomer) MMA Free Manufactured in USA How To Use JND Acrylic Powder: Prep your workspace – You’ll want everything you need around you to make the process as easy as possible, you don’t want to get halfway through and realise you left your files in a drawer while your acrylics are drying! You will need your powder, an Acrylic Brush, a Dappen Dish, Nail Files, Acrylic Liquid, some lint-free wipes, and some pure alcohol.Prepare your Nails – Trim and file your nails to your desired shape. Make sure you don’t have any snags or unevenness. Buff the surface of the nail so that the acrylic bonds better to the nail plate. Push back your cuticles and trim if you wish. If you are using tip extensions here, size and attach the tips, filing them to the correct shape and giving a quick buff to the place where the tip and nail meet to smooth the transition.Clean your Nails – Take a Lint Free Wipe and some Pure Alcohol and wipe each nail to remove any dust, debris and excess oils. If you like, here, you can use Nail Dehydrator and a Bond Strength solution to enhance the strength of the acrylic to the nail.Start to create the nail – Pour some of your acrylic liquid into a dappen dish that you can submerge the bristles of your brush in. Soak the brush and softly roll the bristles against the bottom of the dish to ensure you have removed all the air bubbles from the brush. Tap the brush gently on the side of the dish or blot on a piece of tissue to remove any excess monomer. To pick up the acrylic, place your brush at an angle on the surface of the powder and press down gently, you should be creating a ‘bead’ of wet powder that sticks to the brush. When you have your bead, place the it in the middle of your natural nail and use a downward stroke to spread it down the nail. You can gently push the bead back into the cuticle area to fill in that area.Build the Nail – Now that you have the first bead on, you have a few minutes to push and blend the acrylic into your desired shape. If the first bead wasn’t enough product, you can slowly add more until you get to where you want to be.Shape and File – Now that all the product is applied, take your nail file and smooth out any lumps that may have formed during application. File to your desired shape and size!Clean the nail – Take a Lint-free Wipe with some pure alcohol and clean the nail to remove dust from filing.You can add colour coats here if you wish!Top it off – use a Soak-Off Gel Top Coat to create a shiny, long lasting shine and to seal in the manicure.Aftercare – Wash your hands with normal hand soap once everything is dry and cured. Apply cuticle oil to your fingers and use some hand lotion to re-hydrate the nails and hands. You’re all done! Enjoy your manicure for the next 4-6 weeks! Smooth, Strong and Easy to Work With Our Acrylic Powders are finely milled, expertly created and bond quickly to the nail, creating a strong base for any extension or nail overlays. How to remove Acrylic Extensions and Overlays Note: We will always suggest that unless you are trained or uncomfortable with this process that you should go to a professional to have acrylics removed.File, File, File – Step one is to trim the nails down if it was an extension and to file off the surface of the manicure. This will allow Acetone to soak into the acrylic much more effectively. Soak – Take a bowl that you can fit your finger/s into and fill it with pure Acetone and place your nails in it for 5-10 minutes while the Acetone soaks. (Tip: If you can, place that bowl inside another bowl and fill the outer bowl with warm water, this will help the Acetone do its job and also keep your fingers warmer!)Remove – With a cuticle pusher or a scraper, remove as much soft product as you can. Do not try to force the removal, as this can damage your nailbed! If product isn’t moving, file down some more and repeat the File and Soak steps until you can.Care – Once everything is off, wash your hands and rehydrate your nails and hands with cuticle oild and hand lotion.
Ultra strength and adhesion (*When used with quality acrylic liquid) Ultra fine powder for a smooth finish (Excellent workability and self-levelling flow, less e-file work) An essential product for creating nail art, false nail extensions Advanced Polymer Powder (For speed and accuracy) 100% Pure Premium Polymer (Not mixed with inferior polymers) Product Description Acrylic powder has been a staple of the Nail Beauty industry for years now, and we are dedicating to constantly upholding and improving the standard of the materials available for you to use. JND Acrylic powders are created by professionals for everyone to use, we don’t see why home users shouldn’t also have access to the best of the best! Our powders are used in professional salons and by mobile nail techs as well as thousands of home users across the country. JND Acrylic Powders are made from 100% Pure, Premium Polymers, and we will never ‘water down’ any of our powders with inferior product. What you can use our powders for: Nail Extensions Nail Extensions are always in fashion, not only for people that want longer nails to show off, but for people who want to grow their nails, acrylic overlays can help too! Strengthen and repair nails with acrylic to encourage natural nail growth. Carving and sculpting Create stunning 3D nail art with JND Acrylic powder! Our powder has a quick working time, so it will set within 3-5 minutes, making it perfect for building and shaping non-traditional shapes Adhesive Nail glue not quite strong enough? Fancy jewel inserts too flat to stick to the natural curve of a nail properly? Not a problem! You can use small acrylic beads to create an adhesive surface that you can mould around and smooth into the shape of the nail, creating a long-lasting solution for those of you that love to have bling on your nails. Features: Self-Levelling Non-Yellowing Durable and Strong Easy to use Professional Quality Superior Adhesion (when used with a quality monomer) MMA Free Manufactured in USA How To Use JND Acrylic Powder: Prep your workspace – You’ll want everything you need around you to make the process as easy as possible, you don’t want to get halfway through and realise you left your files in a drawer while your acrylics are drying! You will need your powder, an Acrylic Brush, a Dappen Dish, Nail Files, Acrylic Liquid, some lint-free wipes, and some pure alcohol.Prepare your Nails – Trim and file your nails to your desired shape. Make sure you don’t have any snags or unevenness. Buff the surface of the nail so that the acrylic bonds better to the nail plate. Push back your cuticles and trim if you wish. If you are using tip extensions here, size and attach the tips, filing them to the correct shape and giving a quick buff to the place where the tip and nail meet to smooth the transition.Clean your Nails – Take a Lint Free Wipe and some Pure Alcohol and wipe each nail to remove any dust, debris and excess oils. If you like, here, you can use Nail Dehydrator and a Bond Strength solution to enhance the strength of the acrylic to the nail.Start to create the nail – Pour some of your acrylic liquid into a dappen dish that you can submerge the bristles of your brush in. Soak the brush and softly roll the bristles against the bottom of the dish to ensure you have removed all the air bubbles from the brush. Tap the brush gently on the side of the dish or blot on a piece of tissue to remove any excess monomer. To pick up the acrylic, place your brush at an angle on the surface of the powder and press down gently, you should be creating a ‘bead’ of wet powder that sticks to the brush. When you have your bead, place the it in the middle of your natural nail and use a downward stroke to spread it down the nail. You can gently push the bead back into the cuticle area to fill in that area.Build the Nail – Now that you have the first bead on, you have a few minutes to push and blend the acrylic into your desired shape. If the first bead wasn’t enough product, you can slowly add more until you get to where you want to be.Shape and File – Now that all the product is applied, take your nail file and smooth out any lumps that may have formed during application. File to your desired shape and size!Clean the nail – Take a Lint-free Wipe with some pure alcohol and clean the nail to remove dust from filing.You can add colour coats here if you wish!Top it off – use a Soak-Off Gel Top Coat to create a shiny, long lasting shine and to seal in the manicure.Aftercare – Wash your hands with normal hand soap once everything is dry and cured. Apply cuticle oil to your fingers and use some hand lotion to re-hydrate the nails and hands. You’re all done! Enjoy your manicure for the next 4-6 weeks! Smooth, Strong and Easy to Work With Our Acrylic Powders are finely milled, expertly created and bond quickly to the nail, creating a strong base for any extension or nail overlays. How to remove Acrylic Extensions and Overlays Note: We will always suggest that unless you are trained or uncomfortable with this process that you should go to a professional to have acrylics removed.File, File, File – Step one is to trim the nails down if it was an extension and to file off the surface of the manicure. This will allow Acetone to soak into the acrylic much more effectively. Soak – Take a bowl that you can fit your finger/s into and fill it with pure Acetone and place your nails in it for 5-10 minutes while the Acetone soaks. (Tip: If you can, place that bowl inside another bowl and fill the outer bowl with warm water, this will help the Acetone do its job and also keep your fingers warmer!)Remove – With a cuticle pusher or a scraper, remove as much soft product as you can. Do not try to force the removal, as this can damage your nailbed! If product isn’t moving, file down some more and repeat the File and Soak steps until you can.Care – Once everything is off, wash your hands and rehydrate your nails and hands with cuticle oild and hand lotion.

SKU: B08W9Z3ZW5
  • Ultra strength and adhesion (*When used with quality acrylic liquid)
  • Ultra fine powder for a smooth finish (Excellent workability and self-levelling flow, less e-file work)
  • An essential product for creating nail art, false nail extensions
  • Advanced Polymer Powder (For speed and accuracy)
  • 100% Pure Premium Polymer (Not mixed with inferior polymers)

Product Description Acrylic powder has been a staple of the Nail Beauty industry for years now, and we are dedicating to constantly upholding and improving the standard of the materials available for you to use. JND Acrylic powders are created by professionals for everyone to use, we don’t see why home users shouldn’t also have access to the best of the best! Our powders are used in professional salons and by mobile nail techs as well as thousands of home users across the country. JND Acrylic Powders are made from 100% Pure, Premium Polymers, and we will never 'water down' any of our powders with inferior product. What you can use our powders for: Nail Extensions Nail Extensions are always in fashion, not only for people that want longer nails to show off, but for people who want to grow their nails, acrylic overlays can help too! Strengthen and repair nails with acrylic to encourage natural nail growth. Carving and sculpting Create stunning 3D nail art with JND Acrylic powder! Our powder has a quick working time, so it will set within 3-5 minutes, making it perfect for building and shaping non-traditional shapes Adhesive Nail glue not quite strong enough? Fancy jewel inserts too flat to stick to the natural curve of a nail properly? Not a problem! You can use small acrylic beads to create an adhesive surface that you can mould around and smooth into the shape of the nail, creating a long-lasting solution for those of you that love to have bling on your nails. Features: Self-Levelling Non-Yellowing Durable and Strong Easy to use Professional Quality Superior Adhesion (when used with a quality monomer) MMA Free Manufactured in USA How To Use JND Acrylic Powder: Prep your workspace – You’ll want everything you need around you to make the process as easy as possible, you don’t want to get halfway through and realise you left your files in a drawer while your acrylics are drying! You will need your powder, an Acrylic Brush, a Dappen Dish, Nail Files, Acrylic Liquid, some lint-free wipes, and some pure alcohol.Prepare your Nails – Trim and file your nails to your desired shape. Make sure you don’t have any snags or unevenness. Buff the surface of the nail so that the acrylic bonds better to the nail plate. Push back your cuticles and trim if you wish. If you are using tip extensions here, size and attach the tips, filing them to the correct shape and giving a quick buff to the place where the tip and nail meet to smooth the transition.Clean your Nails – Take a Lint Free Wipe and some Pure Alcohol and wipe each nail to remove any dust, debris and excess oils. If you like, here, you can use Nail Dehydrator and a Bond Strength solution to enhance the strength of the acrylic to the nail.Start to create the nail – Pour some of your acrylic liquid into a dappen dish that you can submerge the bristles of your brush in. Soak the brush and softly roll the bristles against the bottom of the dish to ensure you have removed all the air bubbles from the brush. Tap the brush gently on the side of the dish or blot on a piece of tissue to remove any excess monomer. To pick up the acrylic, place your brush at an angle on the surface of the powder and press down gently, you should be creating a ‘bead’ of wet powder that sticks to the brush. When you have your bead, place the it in the middle of your natural nail and use a downward stroke to spread it down the nail. You can gently push the bead back into the cuticle area to fill in that area.Build the Nail – Now that you have the first bead on, you have a few minutes to push and blend the acrylic into your desired shape. If the first bead wasn’t enough product, you can slowly add more until you get to where you want to be.Shape and File – Now that all the product is applied, take your nail file and smooth out any lumps that may have formed during application. File to your desired shape and size!Clean the nail – Take a Lint-free Wipe with some pure alcohol and clean the nail to remove dust from filing.You can add colour coats here if you wish!Top it off – use a Soak-Off Gel Top Coat to create a shiny, long lasting shine and to seal in the manicure.Aftercare – Wash your hands with normal hand soap once everything is dry and cured. Apply cuticle oil to your fingers and use some hand lotion to re-hydrate the nails and hands. You’re all done! Enjoy your manicure for the next 4-6 weeks! Smooth, Strong and Easy to Work With Our Acrylic Powders are finely milled, expertly created and bond quickly to the nail, creating a strong base for any extension or nail overlays. How to remove Acrylic Extensions and Overlays Note: We will always suggest that unless you are trained or uncomfortable with this process that you should go to a professional to have acrylics removed.File, File, File – Step one is to trim the nails down if it was an extension and to file off the surface of the manicure. This will allow Acetone to soak into the acrylic much more effectively. Soak – Take a bowl that you can fit your finger/s into and fill it with pure Acetone and place your nails in it for 5-10 minutes while the Acetone soaks. (Tip: If you can, place that bowl inside another bowl and fill the outer bowl with warm water, this will help the Acetone do its job and also keep your fingers warmer!)Remove – With a cuticle pusher or a scraper, remove as much soft product as you can. Do not try to force the removal, as this can damage your nailbed! If product isn’t moving, file down some more and repeat the File and Soak steps until you can.Care – Once everything is off, wash your hands and rehydrate your nails and hands with cuticle oild and hand lotion.
Ultra strength and adhesion (*When used with quality acrylic liquid) Ultra fine powder for a smooth finish (Excellent workability and self-levelling flow, less e-file work) An essential product for creating nail art, false nail extensions Advanced Polymer Powder (For speed and accuracy) 100% Pure Premium Polymer (Not mixed with inferior polymers) Product Description Acrylic powder has been a staple of the Nail Beauty industry for years now, and we are dedicating to constantly upholding and improving the standard of the materials available for you to use. JND Acrylic powders are created by professionals for everyone to use, we don’t see why home users shouldn’t also have access to the best of the best! Our powders are used in professional salons and by mobile nail techs as well as thousands of home users across the country. JND Acrylic Powders are made from 100% Pure, Premium Polymers, and we will never 'water down' any of our powders with inferior product. What you can use our powders for: Nail Extensions Nail Extensions are always in fashion, not only for people that want longer nails to show off, but for people who want to grow their nails, acrylic overlays can help too! Strengthen and repair nails with acrylic to encourage natural nail growth. Carving and sculpting Create stunning 3D nail art with JND Acrylic powder! Our powder has a quick working time, so it will set within 3-5 minutes, making it perfect for building and shaping non-traditional shapes Adhesive Nail glue not quite strong enough? Fancy jewel inserts too flat to stick to the natural curve of a nail properly? Not a problem! You can use small acrylic beads to create an adhesive surface that you can mould around and smooth into the shape of the nail, creating a long-lasting solution for those of you that love to have bling on your nails. Features: Self-Levelling Non-Yellowing Durable and Strong Easy to use Professional Quality Superior Adhesion (when used with a quality monomer) MMA Free Manufactured in USA How To Use JND Acrylic Powder: Prep your workspace – You’ll want everything you need around you to make the process as easy as possible, you don’t want to get halfway through and realise you left your files in a drawer while your acrylics are drying! You will need your powder, an Acrylic Brush, a Dappen Dish, Nail Files, Acrylic Liquid, some lint-free wipes, and some pure alcohol.Prepare your Nails – Trim and file your nails to your desired shape. Make sure you don’t have any snags or unevenness. Buff the surface of the nail so that the acrylic bonds better to the nail plate. Push back your cuticles and trim if you wish. If you are using tip extensions here, size and attach the tips, filing them to the correct shape and giving a quick buff to the place where the tip and nail meet to smooth the transition.Clean your Nails – Take a Lint Free Wipe and some Pure Alcohol and wipe each nail to remove any dust, debris and excess oils. If you like, here, you can use Nail Dehydrator and a Bond Strength solution to enhance the strength of the acrylic to the nail.Start to create the nail – Pour some of your acrylic liquid into a dappen dish that you can submerge the bristles of your brush in. Soak the brush and softly roll the bristles against the bottom of the dish to ensure you have removed all the air bubbles from the brush. Tap the brush gently on the side of the dish or blot on a piece of tissue to remove any excess monomer. To pick up the acrylic, place your brush at an angle on the surface of the powder and press down gently, you should be creating a ‘bead’ of wet powder that sticks to the brush. When you have your bead, place the it in the middle of your natural nail and use a downward stroke to spread it down the nail. You can gently push the bead back into the cuticle area to fill in that area.Build the Nail – Now that you have the first bead on, you have a few minutes to push and blend the acrylic into your desired shape. If the first bead wasn’t enough product, you can slowly add more until you get to where you want to be.Shape and File – Now that all the product is applied, take your nail file and smooth out any lumps that may have formed during application. File to your desired shape and size!Clean the nail – Take a Lint-free Wipe with some pure alcohol and clean the nail to remove dust from filing.You can add colour coats here if you wish!Top it off – use a Soak-Off Gel Top Coat to create a shiny, long lasting shine and to seal in the manicure.Aftercare – Wash your hands with normal hand soap once everything is dry and cured. Apply cuticle oil to your fingers and use some hand lotion to re-hydrate the nails and hands. You’re all done! Enjoy your manicure for the next 4-6 weeks! Smooth, Strong and Easy to Work With Our Acrylic Powders are finely milled, expertly created and bond quickly to the nail, creating a strong base for any extension or nail overlays. How to remove Acrylic Extensions and Overlays Note: We will always suggest that unless you are trained or uncomfortable with this process that you should go to a professional to have acrylics removed.File, File, File – Step one is to trim the nails down if it was an extension and to file off the surface of the manicure. This will allow Acetone to soak into the acrylic much more effectively. Soak – Take a bowl that you can fit your finger/s into and fill it with pure Acetone and place your nails in it for 5-10 minutes while the Acetone soaks. (Tip: If you can, place that bowl inside another bowl and fill the outer bowl with warm water, this will help the Acetone do its job and also keep your fingers warmer!)Remove – With a cuticle pusher or a scraper, remove as much soft product as you can. Do not try to force the removal, as this can damage your nailbed! If product isn’t moving, file down some more and repeat the File and Soak steps until you can.Care – Once everything is off, wash your hands and rehydrate your nails and hands with cuticle oild and hand lotion.
Reviews

There are no reviews yet.

Only logged in customers who have purchased this product may leave a review.

YOU MIGHT LIKE